How to Inspect & Clean a Bike Crankset
Though a bike has a bunch of parts, the crankset or chain-set is the most essential component of a bike. When you pedal, it converts this reciprocating motion into rotational motion and helps to drive the bike forward.

To inspect your crankset, find out if there is any damage like dents, cracks, or looseness. To clean the crankset, you can wash the bike as you do regularly but don’t use any power sprayer to clean it.
Rather you can use a brush and solvent to clean your crankset. In this write-up, you’ll get what you need to inspect on a bike crankset and the basics of cleaning it.
What Should You Inspect About The Crankset Of Your Bike?
While inspecting your crankset, ensure that it’s not broken. This is the basic part of a bike crankset removal.
If there are any broken parts of the crank arms and chainrings, to find them you can wiggle the whole thing and check if any parts fall off.
Sometimes if you tighten some of the components of the chainset, everything will work properly.
Your bike’s crankset is low to the ground, and it’s easy to catch dirt and water. Check if there are any rust, cracks, or dents on the crankset or crank arms.
If the crankset is covered in mud from the tires’ mud-kicking, and before you know it, your gears are clogged with rust and crud.
The easiest technique to remove rust from metal is to soak it in cola. After a Coke bath, your crankset can appear fresh and new. You can remove rust with different cleaning chemicals.
The crankset must first be disassembled before being immersed in the cleaning solution. It’s essential to keep in mind which components belong where for this phase.
To put each component back on, make sure to remember how you removed it. You’ll then have separate components that are simple to clean.
What You’ll Need
- Repair stand
- Rags
- Cleaning solvent
- Disposable gloves
- Small screwdriver
- Brush
- Chain-cleaner tool
Check Your Bike Chain Before You Start Cleaning
Check if your chain has a 12-inch gap between two pins. Otherwise, your bike’s chain is worn out, and you need to replace them.
Don’t use a new chain with a worn or old cassette; otherwise, it may skip while pedaling and cause a crash. So that you have to replace the cassette also.
If you have completed mega miles with your favorite bike, replacing the chain rather than cleaning it would be better.
How To Clean A Bike Crankset?
Here are some basic processes that you can follow while cleaning your crankset-
- Clean The Chain
Use some biodegradable solvent on a cloth or rag and wipe the chain and the links; before doing this, put on a pair of disposable gloves. You can quickly wipe the greasy mess by scrubbing the chain like this.
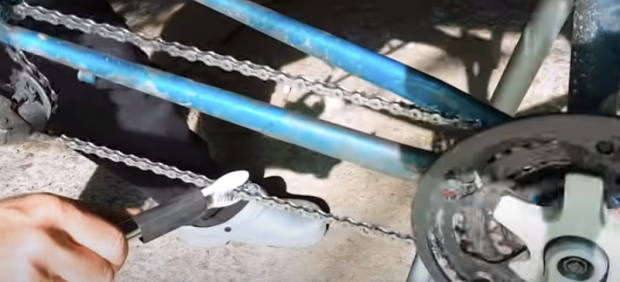
You can use two brushes together as you’re seeing in the picture to clean the chain. Try to clean both sides of the chain as well as the top and bottom sides.
- Scrub The Chain
If the chain is filled with dirt and mud, it’ll need a more heavy cleaning procedure. Put some solvent in a bowl, and place the bucket under the chain.
Now use a brush and dip it into the solvent to scrub the links. After cleaning the chain, remove all the solvent from the chain properly.
Otherwise, you can use a chain-cleaning tool to give you a spic and span chain back.
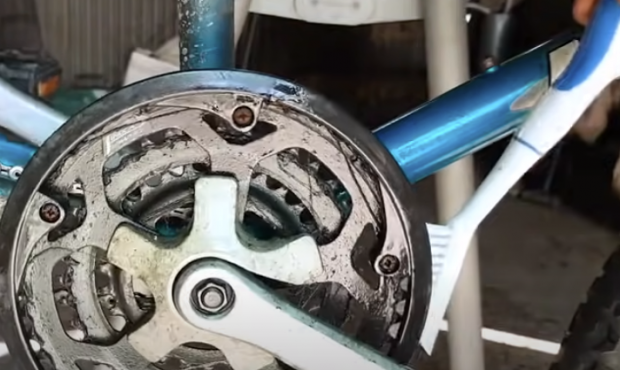
- Clean The Crankset
Try to lift the chain off the ring and put it on the frame. First, clean the large chainring and then try the smaller one with a rag or cloth.
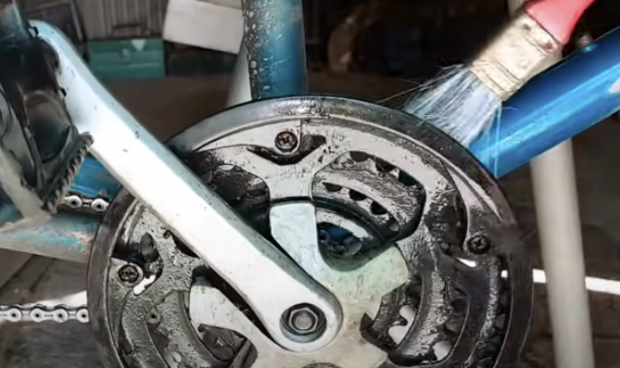
If there are any grimy deposits between the rings, try to knock them off. You can use a screwdriver or a brush to clean them off.
- Clean The Cassette
Remove the rear wheel and put it on your workbench but be careful while placing it. The rear wheel should be placed with the cassette facing up.
Rotate the clog with a rag to clean it properly and follow the cogs’ process. After cleaning both of them, reinstall the wheel again.
- Check the Derailleurs
Check the pulleys on the rear derailleur of your crankset, then wipe it to get rid of any sludge. Use a cloth to remove all the grimy deposits. You can put some lube on the chain as well as the derailleur.
Some Things You Need To Careful About Crankset
A crankset has varied from bicycle to bicycle, but it works the same. So be careful while cleaning and inspecting the crankset of your bike. Pull out the crank handle using a rubber mallet to ensure it doesn’t damage the bottom bracket socket.
Regular maintenance is the greatest way to care for anything, whether a bicycle or a car. The best way to prevent future problems is to practice preventative maintenance.
You should clear out any dirt or grime that becomes lodged in your crankset. Any debris over time can harm a crankset, causing it to rust or rub against other bike components.
Wiping down a crankset after a ride is all it takes to clean it. Use a toothbrush for this purpose.
Keeping a bike’s crankset dry and clean is the best maintenance method. Wiping and cleaning your chain down is safer and cheaper than buying a new crankset.
Wrapping Up
Before you go to clean and inspect your crankset, make sure you know the type of yours. When you know the crank system of your bike, it’ll be easier for you to inspect any issues and clean them properly.
Be careful when you’re cleaning the components of the crankset like the cranks, bottom bracket as well as chainrings. Follow this write-up and the tricks we’ve mentioned here while cleaning your crankset.